Missy/Sissy Book

Supplies: rubber stamps, acrylic block, black ink, colored pencils, felt tip pen, 10-15 sheets of 8 1/2" x 11" paper, one sheet of 8 1/2" x 11" cardstock, ruler, bone folder, post it notes, book binding awl, heavy thread, needle, two binder clips, scissors.
| Take anywhere from 10 to 15 sheets of paper and fold them in half one at a time to 8 1/2" x 5 1/2". Each is called a folio. Place them one inside the other to create the inside of your book, called the signature. Making sure the folios are nice and tight inside each other, cut off the edges sticking out a bit so it's flush. Set this aside for later. |  |
| Take your sheet of card stock and fold it in half so it's 8 1/2" x 5 1/2". Stamp both the Wisteria and the Water Lily Bouquet on scratch paper and cut them out for your masks, overcutting into the image a bit to avoid a halo effect. You can use your masks now to get an idea of where to stamp these images. |  |
| Mask just at the fold on the front of your book cover and stamp the Wisteria on the back half. Next mask the back half of the cover and stamp the Water Lily Bouquet on the front half. |  |
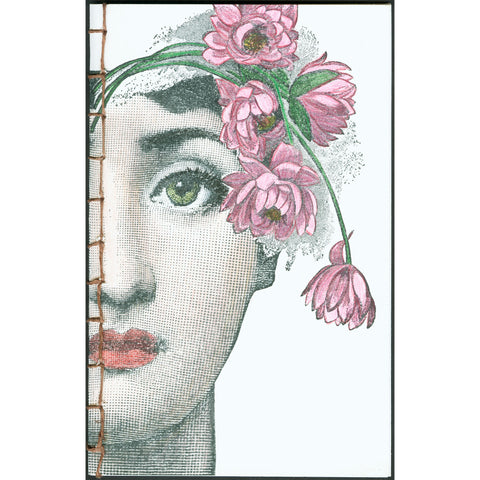
| Now you can take Missy and Sissy and lay them on the cover to get an idea of their placement so they fit nicely under the Wisteria and the Water Lily Bouquet. This way you can also make sure you stamp them at the same level so they match up well. I marked on both Missy and Sissy where the bottom of the cardstock hit to help me with positioning. |  |
| I transferred that same mark onto the acrylic block so I could see it better while I was stamping and I lined it up with the bottom of the cardstock. I stamped each image right up against the fold (you can mask the other half with a sheet of paper) masking the Wisteria and the Water Lily Bouquet. You need to apply a lot of pressure, especially around the center of Missy and Sissy and also where the masks are. I like to do "CPR" on the larger stamps making sure I don't move the stamp as I move my hands. Also placing a magazine under your cardstock helps a great deal. |  |
| The cover is now stamped. Notice how well Missy and Sissy mirror each other? |  |
| I colored the cover with colored pencils. |  |
| Next take your signature and place it inside your cover nice and snug against the crease. Clamp the top and bottom with a binder clip to keep everything in place. |  |
| With your ruler, measure in about a quarter inch and place one mark right in the middle which is at 4 1/4". From there I made five marks above that 3/4" apart with the highest mark being 1/2" away from the top. I did the same below making five marks 3/4" apart with the lowest being 1/2" away from the bottom. |  |
| Using your awl, punch through your book on each marking. |  |
| With your needle and thread, start at the center hole threading into it from the back to the front. Leave a few inches hanging. Working your way to the top of the book, thread down into the next hole and then over the spine and back into the same hole. Thread up into the next hole then over the spine and back into the same hole. |  |
| Once you reach the top of the book and you've thread through the top hole you'll go over the edge with your thread and then back into that top hole. From here you will just thread in and out of holes back towards the center without going over the spine at all. |  |
| Once you reach the center hole on your way down, SKIP IT. Go to the next hole and do just like you did on the top half of the book. |  |
| Once you've made your way back to the center, put your thread back down through that center hole to the back side of your book. You can now tie the two pieces together and you are done! |  |


Missy 920S
$ 12.50
4 1/4" x 7 3/4"
- Unmounted: Rubber die only
- Cling Mount: Rubber die on cling foam cushion closely trimmed (block not included)
- Wood Mount: Red rubber die with black foam cushion on a white maple wood mount
Click "View full product details" to see slideshow of artwork using this stamp.
Sissy 1187S
$ 12.50
4 1/4" x 7 3/4"
- Unmounted: Rubber die only
- Cling Mount: Rubber die on cling foam cushion closely trimmed (block not included)
- Wood Mount: Red rubber die with black foam cushion on a white maple wood mount
Click "View full product details" to see slideshow of artwork using this stamp.
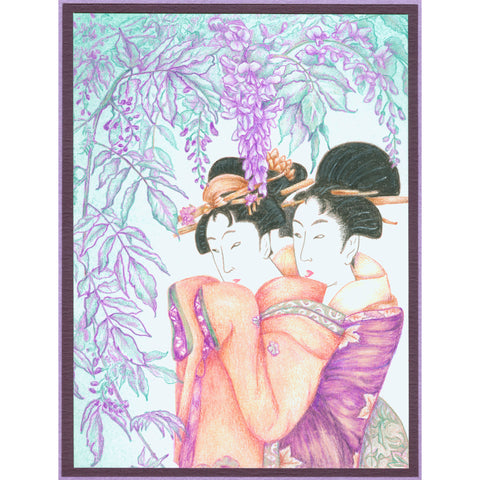
Large Wisteria 1161S
$ 12.50
5 1/4" x 7 1/2"
- Unmounted: Rubber die only
- Cling Mount: Rubber die on cling foam cushion closely trimmed (block not included)
- Wood Mount: Red rubber die with black foam cushion on a white maple wood mount
Click "View full product details" to see slideshow of artwork using this stamp.

Water Lily Bouquet 1156R
$ 11.50
6 3/4" x 5"
- Unmounted: Rubber die only
- Cling Mount: Rubber die on cling foam cushion closely trimmed (block not included)
- Wood Mount: Red rubber die with black foam cushion on a white maple wood mount
Click "View full product details" to see slideshow of artwork using this stamp.